
Quick Summary
Automatic gate sensor malfunctions – often triggered by coastal humidity, lens condensation, or bracket misalignment – can compromise property security and violate vital UL 325 entrapment protection standards. Ironworks Gate Co. delivers expert gate sensor repair and diagnostics engineered to withstand coastal wear, guiding property owners through photo eye realignment, optical cleaning, and terminal weatherproofing. Readers will understand how to troubleshoot recurring sensor faults and can schedule a free on-site diagnostic with Ironworks Gate Co. to receive an upfront written repair quote.
Gate Sensor Repair – Diagnostics and Fixes
If your driveway gate is stuck open, reversing for no clear reason, or refusing to close after dark, you are likely dealing with a safety sensor failure. Ironworks Gate Co. provides gate sensor repair throughout Newport Beach, Balboa Island, Newport Coast, and neighboring communities. Outdoor exposure presents common challenges: moisture and dirt can obscure optical lenses, humidity can affect low-voltage terminals, and physical impacts or ground movement can disrupt alignment. When sensors fail, your property’s security and vehicle access can be interrupted.[3]
Technicians can help identify whether your issue comes from obscured lenses, shifted post brackets, damaged ground loops, or corroded circuit terminals. Contact us to schedule a diagnostic visit.
Diagnostic Overview: What Causes Gate Sensors to Fail?
Automated gate installations incorporate entrapment protection devices such as through-beam photo eyes, retro-reflective sensors, and safety edges, along with vehicle detection devices such as in-pavement inductive loops. Under UL 325 safety standards, automatic gates require entrapment protection devices such as photo eyes or safety edges and may reverse or stop when obstructed.[2]
Safety is the primary reason automatic gates rely on these components. Data from the U.S. Consumer Product Safety Commission (CPSC) shows that automatic gates have caused thousands of emergency room injuries and multiple entrapment deaths over the decades, predominantly involving children. Keeping these sensors operational is essential for the safety of your family and guests.[1]
When to Clean and Adjust vs. When to Replace
| Symptom | Probable Root Cause | Recommended Action |
|---|---|---|
| Gate opens normally but will not close; sensor LED blinks rapidly | Dirt or residue on lens, or physical bracket misalignment | Clean optics with microfiber cloth, realign transmitter and receiver |
| Gate stops and reverses intermittently during fog or heavy moisture | Moisture and residue scattering infrared beam | Clean lens face, fit protective weather hoods, verify beam focus |
| No status LED lights on sensor; operator shows safety fault code | Corrosion on terminal screws, cut wire, or blown board fuse | Test DC supply voltage with multimeter; replace damaged wiring or sensor unit |
| Gate stays open continuously; loop detector light stays lit | Water intrusion inside asphalt saw-cut or failed inductive loop module | Inspect loop sealant, test loop inductance, replace detector module if shorted |
Tools and Supplies for Gate Sensor Troubleshooting
Before inspecting your gate, always switch the operator power off or disconnect the arm to prevent unexpected movement during testing.
Diagnostic Tools
- Digital multimeter: Checks for steady 12V to 24V DC/AC power at the sensor terminals.
- Laser pointer or string line: Confirms line-of-sight alignment across wide driveway spans.
- Clean microfiber cloth and optical cleaner: Safely clears dried residue without scratching acrylic covers.
Weatherproofing Supplies
- Dielectric grease: Protects copper terminals from moisture-induced oxidation.
- Silicone sealant and gaskets: Seals conduit entries and backplates against moisture penetration.
- Protective hoods: Deflects sprinkler spray and low-angle sun glare.
Step 1: Clean Residue from Optical Lenses
As technicians at Ironworks Gate Co. note, environmental dust, moisture, and residue can settle on the exterior of photo eye lenses over time. This build-up can scatter or diffuse the infrared light beam so the receiver cannot register the signal. The gate operator may interpret this interrupted beam as an obstruction, preventing the gate from closing.
- Turn off power to the gate operator before working around the gate path.
- Spray a mild optical cleaner or distilled water directly onto a clean microfiber cloth. Never use harsh abrasive chemicals or dry paper towels, which can scratch the plastic lens face.
- Gently wipe away residue, dirt, and cobwebs from both the sending and receiving units (or the reflector).
- Check the interior of clear housings for moisture droplets. If condensation is trapped inside, the seal may have failed and the unit may require replacement.
Step 2: Check Power and Diagnostic Indicator LEDs
Many photo eye models feature LED diagnostic indicators on the housing to communicate power and alignment status.
- Restore power to the operator and inspect any indicator lights on the transmitter and receiver units.
- Solid LED on units: Indicates power is present and optical alignment is established.
- Flashing LED on receiver: The receiver detects a weak signal, which may indicate minor misalignment, dirty optics, or low voltage.
- No LED lit: The unit may have lost power. Open the sensor cover and test the terminal screws with a multimeter to verify 12V-24V input. If power is present at the terminals but the sensor remains unlit, internal component failure may have occurred.
Step 3: Realign Misaligned Photo Eye Safety Beams
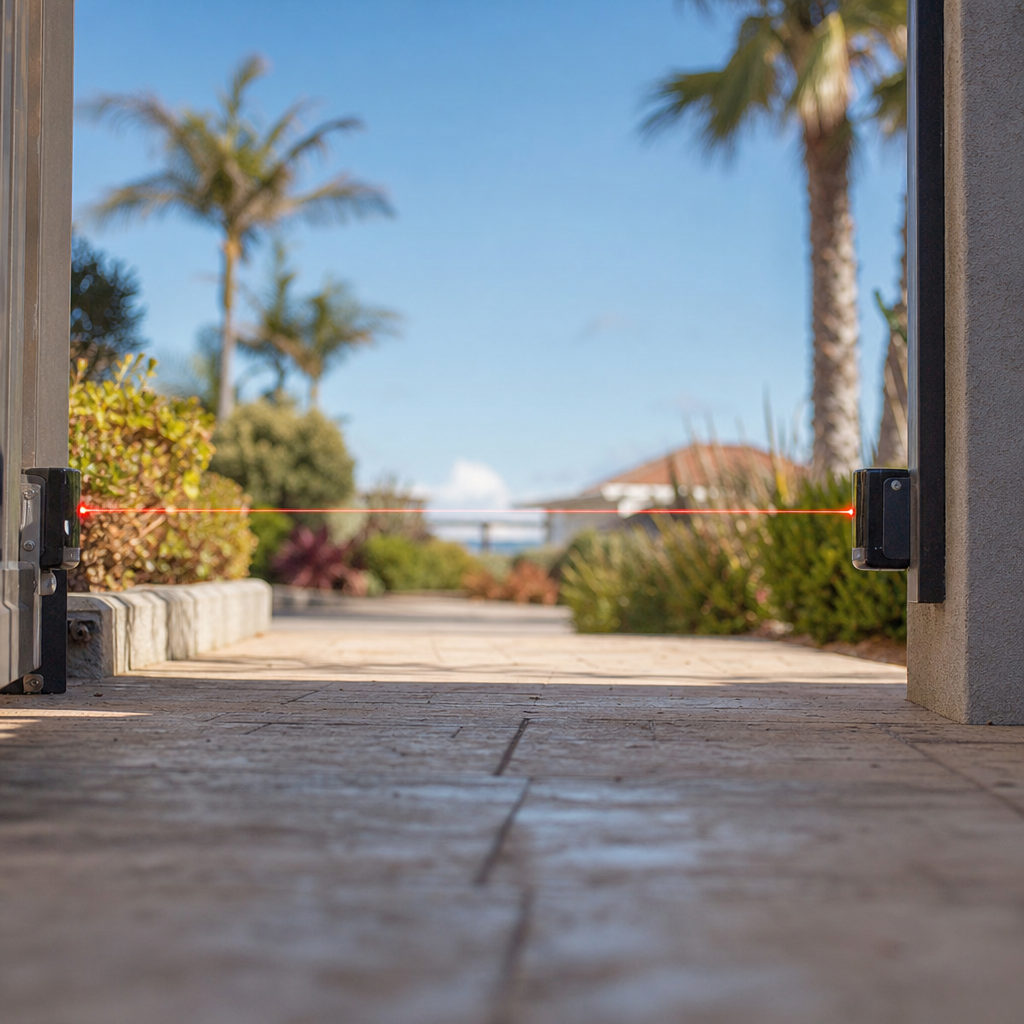
Gate posts can shift over time due to ground settling, vehicle contact, or heavy winds. Across wide driveway openings, even a slight post shift can misalign an infrared beam.
- Loosen the mounting bracket hardware slightly on the receiver unit.
- Slowly adjust the pitch (vertical angle) and yaw (horizontal angle) while watching the receiver LED indicator.
- When the LED indicates a steady signal, the beam has been aligned.
- Tighten all bracket mounting screws firmly to prevent vibrations from gate movement or wind from shifting the unit out of position.
Step 4: Test Inductive Ground Loops
Inductive driveway loops buried in asphalt or concrete are vehicle detection devices rather than entrapment protection devices. They can malfunction if moisture penetrates damaged pavement sealant, altering the electrical inductance and causing the detector to signal an ongoing vehicle presence.
- Open the operator housing and locate the plug-in loop detector module.
- Observe the diagnostic LEDs on the module. If the detection light stays on with no vehicle present, adjust the sensitivity dial downward.
- If the loop remains activated, inspect the sealant in the driveway cuts for cracking or water penetration.
- Test overall gate safety by verifying that monitored entrapment protection devices, such as safety edges or photo eyes, cause the gate to stop or reverse when obstructed.
Step 5: Seal Enclosures Against Moisture
Sensor enclosures exposed to outdoor conditions may require additional weatherproofing to prevent moisture intrusion and prolong component life.
- Apply a thin layer of dielectric grease over terminal screw connections and wire strands to help protect copper leads from corrosion.
- Check the rubber perimeter gasket on the sensor cover. If the gasket is damaged or missing, apply exterior-grade silicone sealant around the backplate and wire entry knockouts.
- If sprinklers direct water toward the photo eye, install a protective deflector hood to help shield the housing from direct spray.
Understanding Repair and Replacement Needs
Service requirements depend on the root cause of the issue and the equipment installed:
- Optical cleaning and bracket realignment: Involves cleaning the lens optics and adjusting mounting brackets to restore beam alignment.
- Photo eye replacement: Replacing a damaged or failing monitored safety sensor includes installing compatible hardware and wiring the terminals.
- Inductive ground loop repairs: Addressing vehicle loop issues may involve replacing an in-cabinet detector module or resealing and repairing in-ground wiring.
Ironworks Gate Co. provides written estimates prior to performing repair work.[4]
Frequently Asked Questions
Why does my automatic gate sensor stop working after dark?
As evening temperatures drop, condensation can form on photo eye lenses and mix with surface dust. This moisture layer can diffuse the infrared beam, causing the operator to register an obstruction. Adding protective hoods and keeping lenses clean can help prevent this issue.
Why is my gate sensor constantly beeping?
According to Ironworks Gate Co., beeping from an operator or sensor module often indicates an active safety fault, a misaligned beam, or low battery power in wireless safety edges. Check the status indicator lights on your sensors and verify that the beam path is clear of obstructions.
Can I replace an electric gate sensor myself?
Property owners can safely clean lenses and clear obstructions. However, gate operators subject to UL 325 safety standards require monitored entrapment protection sensors. Installing an incompatible sensor or connecting it incorrectly can prevent the operator from functioning. Professional installation helps ensure proper operation and standard compliance.
How do I manually open my gate if the sensors are stuck?
Locate the key or manual release lever on your gate operator to disengage the drive mechanism. This allows you to manually open or close the gate while awaiting service.
How quickly can a technician fix my gate sensor?
Repair timing depends on technician availability, diagnostic findings, and the replacement parts required. Contact Ironworks Gate Co. to discuss scheduling a service visit for your gate system.
Sources
- New Safety Standard for Automatic Security Gates Helps … – cpsc.gov (2000)
- AB 2149 (Connolly) – sjud.senate.ca.gov (2001)
- [PDF] 2015 Annual Report – Consumer Product Safety Commission – cpsc.gov (2015)
- The Serious Dangers of Automatic Gates – hg.org
Related reading: Sliding Vs Swing Gate – Call Now-10% Off – Same-Day Service – Free Estimate
Related reading: How to Manually Open Electric Gate – Call Now-10% Off – Same-Day Service – Free Estimate
Frequently Asked Questions
How do I get an accurate cost estimate for my gate sensor repair?
Property owners can schedule a free on-site gate sensor diagnostic with Ironworks Gate Co. to evaluate photo eye alignment, ground loop wiring, and moisture damage. Technicians determine the exact root cause and provide an upfront written repair quote before performing any service.
How can I protect my driveway gate sensors from coastal salt air and fog?
Protecting coastal sensors requires fitting deflector hoods to block marine fog, sealing entry knockouts with silicone gaskets, and applying dielectric grease to electrical terminals. Ironworks Gate Co. installs corrosion-resistant enclosures and weatherproofing treatments engineered specifically for coastal conditions.
Why won't my automatic gate close after installing a new photo eye sensor?
Modern gate operators require UL 325 monitored entrapment protection sensors that continuously verify system status with the main control board. If an incompatible or unmonitored sensor is connected, the operator will trigger a safety lockout until Ironworks Gate Co. installs and calibrates a compliant sensor.
About the author
 |
Sarah O’Connor Sarah is a technical writer specializing in home security and access control systems. With over eight years of experience writing for property management and contractor publications, she translates complex mechanical and electrical concepts into clear, actionable advice. She holds a B.A. in Communications from California State University, Fullerton, and frequently consults with certified gate technicians to ensure her content is accurate and practical. |
Gate not opening, off track, or opener dead?
We’re available now - call for a fast, free estimate.
Call Now - Free Estimate